Docs Menu
- Introduction to Syncloop
- Quick Start Syncloop
-
API Developer Guide
-
middleware
-
pub
- adapter
- authorization
- client
- collection
- date
- docList
- file
- graphQL
- io
- json
- jwt
- math
- platform
- security
- server
- service
- specs
- sql
- string
- bytesToHexString
- bytesToString
- compare
- compareStrings
- concat
- decodeBase64
- decodeHTML
- encodeBase64
- encodeHTML
- equals
- equalsIgnoreCase
- escapeSQL
- fromXML
- htmlDecode
- htmlEncode
- indexOf
- isAlphanumeric
- isBlank
- isDate
- isEmpty
- isNumber
- length
- lookupDict
- maskString
- messageDigest
- messageFormat
- NullOrWhiteSpc
- objectToString
- padLeft
- replace
- rightPad
- stringConcat
- stringIndexOf
- stringToBytes
- subString
- TextArrayToTextString
- TextListCollector
- tokenize
- toLower
- toString
- toUpper
- trim
- urlDecode
- tenant
- util
- xml
-
pub
-
middleware
- User Guide
- FAQs
- Java Docs
- Blogs
Crypto Currency Converter
Welcome back to our new tutorial. This tutorial will show you how to consume an external API on the Syncloop API development platform. We are trying to use a Currency Convertor API which provides the currency conversion rates of any two currencies. The details including the endpoint of the API are shown below:
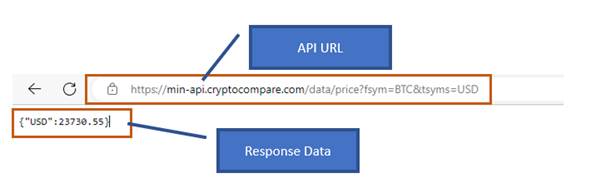
The API URL is given by
https://min-api.cryptocompare.com/data/price?fsym=BTC&tsyms=USD
Let us create the service for this API on the Syncloop API Development Platform
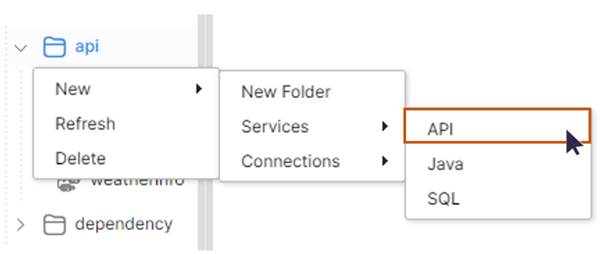
Login into the Syncloop API Development Platform workspace and create a new Flow Service
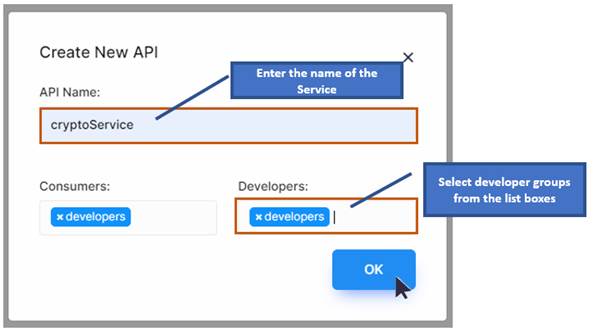
While clicking on the flow menu item a New Flow dialog will appear. Enter the name API Service name as cyptoService, select developers groups from the developers and consumers, and click on the OK button.
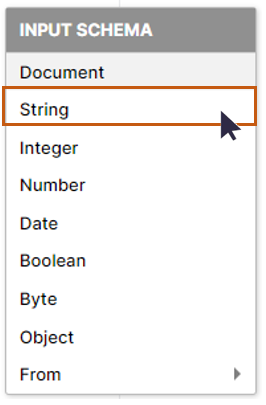
In this service we expect two parameters from-currency and to-currency. So to implement that we need to create two input parameters in the Syncloop workspace of type String and name them from and to.
Right-Click on the Input Parameter Section and an input Schema context menu will be displayed. Click on the String option.
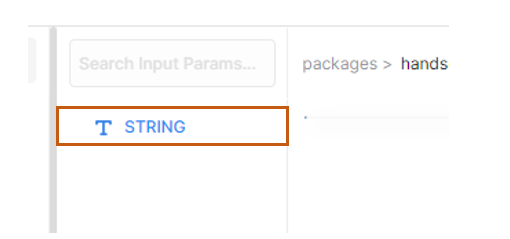
A new String input parameter will be created.
Right-Click on the String parameter and select Rename. Rename the parameter to from.
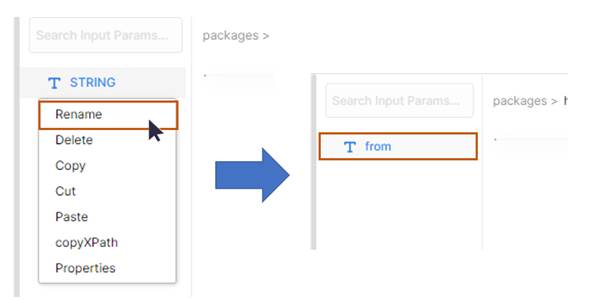
Repeat the above two steps for creating the second parameter in the input parameter section and name it as to.
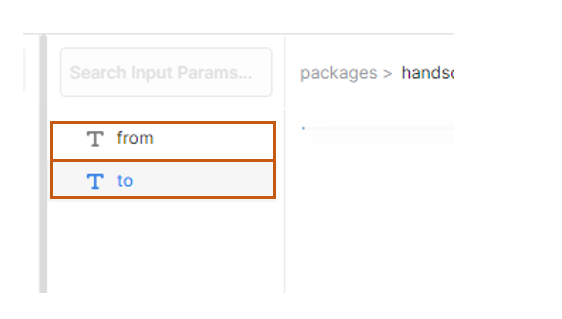
Now we have successfully created two input parameters from and to
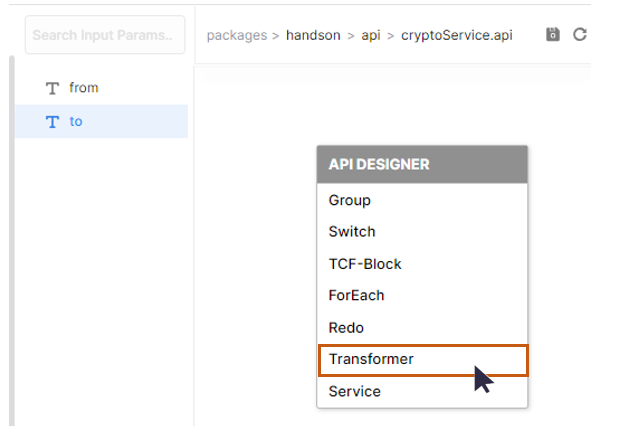
Right-Click on the workspace and a FLOW DESIGNER context menu will appear. Select Transformer from the context menu to create a new TRANSFORMER.
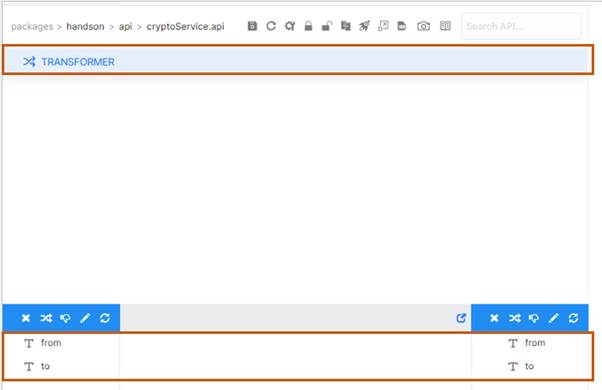
A new TRANSFORMER will be created with two elements from and to in the Request Section and the Response Section of the workspace.
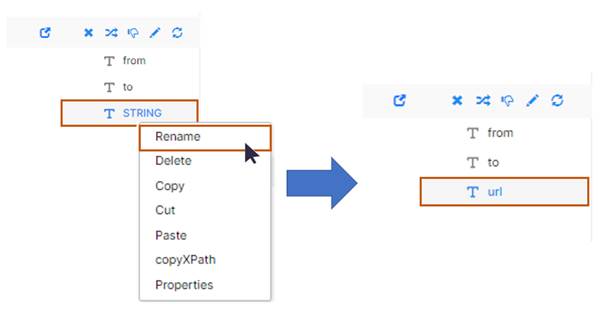
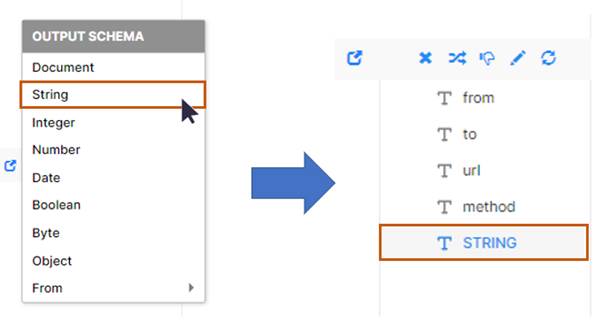
Now right-click on the Response Section of the Workspace. An OUTPUT SCHEMA context menu will appear. Select String from the context menu.

Right-Click on STRING parameter and a context menu will be displayed. On the content, menu click on Rename option to rename the STRING to url
Now go to the Currency Convertor URL shown below and copy it:
https://min-api.cryptocompare.com/data/price?fsym=BTC&tsyms=USD
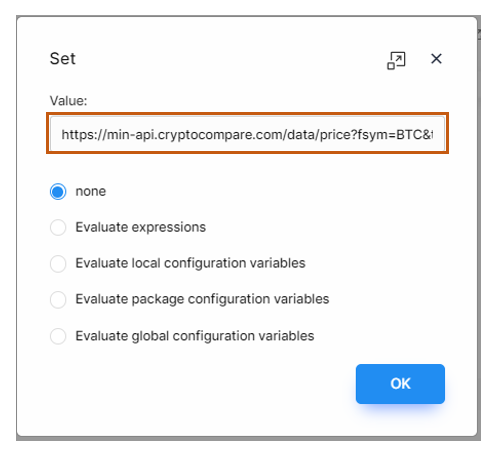
Click on the url element in the Response Section of the workspace and select initialize the element ![]() tool from the section toolbar.
tool from the section toolbar.
A Set dialog window will appear. In the value text box of the dialog paste the URL of the currency converter that was already copied.
Now modify the path which has been pasted in the value textbox in the Set dialog window for fsym and tsym parameters. Modify the URL string by passing dynamic parameters (from and to) from the workspace to the URL for the above two parameters.
The modified URL string will look like this
https://min-api.cryptocompare.com/data/price?fsym=#{from}tsyms=#{to}
Modify the string in the textbox also by manually changing it or copy-pasting the above URL string in the value textbox of the Set dialog. Select the evaluate expression from the option list.
Click on the OK button to confirm the initialization.

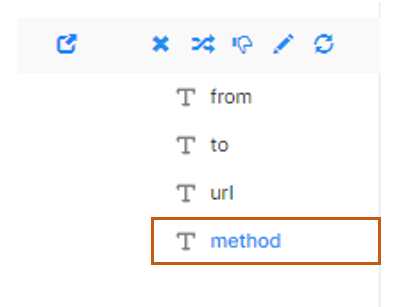
Create another parameter of type STRING in the Response Section of the Syncloop workspace and rename it to method.
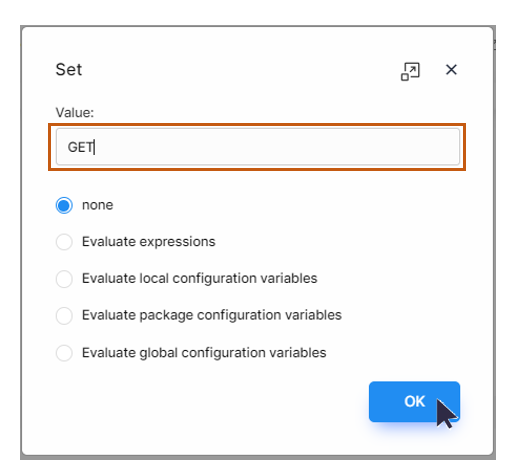
Click on the method element in the Response Section of the workspace and select initialize the element  tool from the toolbar. A Set dialog will be
displayed. Type GET in the value textbox and click on the OK Button.
tool from the toolbar. A Set dialog will be
displayed. Type GET in the value textbox and click on the OK Button.
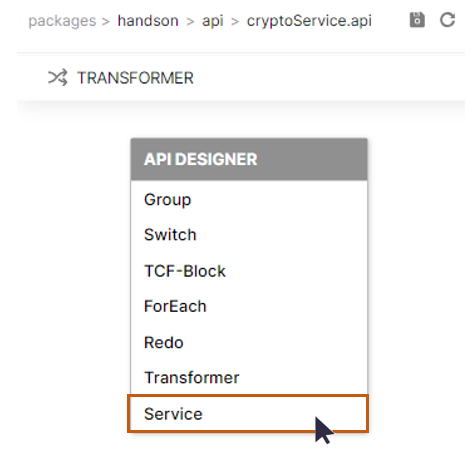
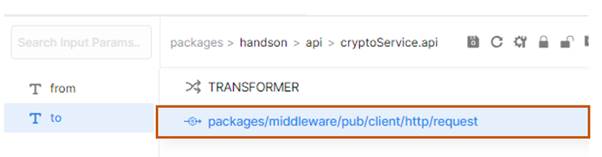
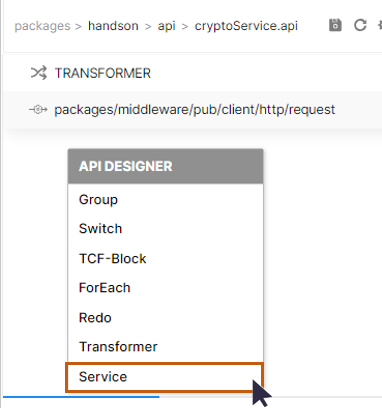
Let us call the HTTP Client now. Right-Click on the workspace and a API DESIGNER context menu will be displayed. Select Service from the context menu.
A dialog for selecting a service will be displayed. Search the service in the package explorer window by typing request in the search package textbox.
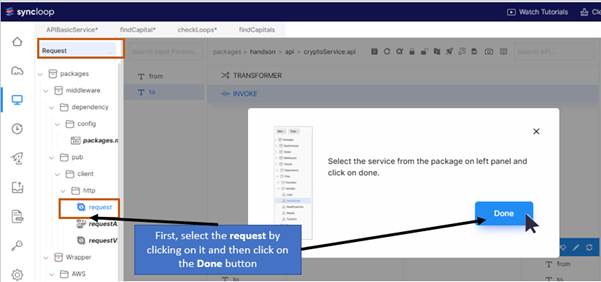
Select the request by searching in the package search textbox and then clicking on the request service once searched. Once the request service is selected click on the Done button to confirm. HTTP client path will be added to the workspace.
Now click on the HTTP Client path and observe the input and output parameters
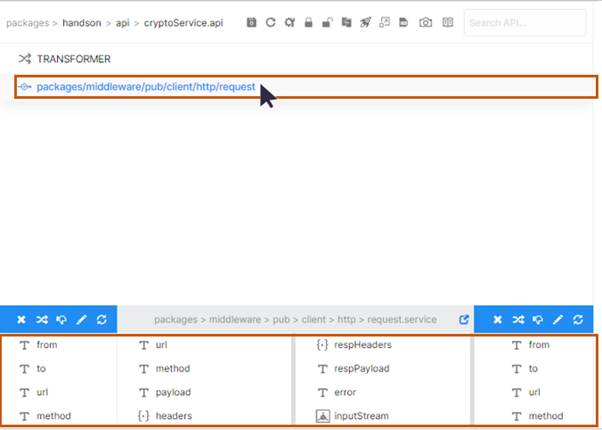
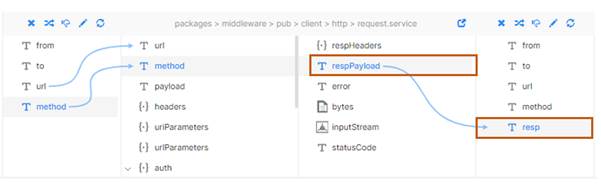
Now map the parameters in the Input and Output sections of the workspace.
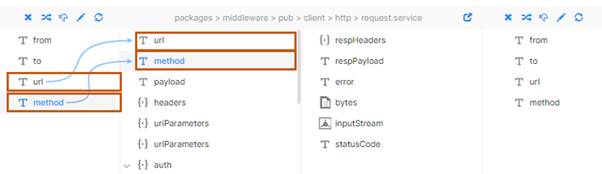
First map the url and the method elements in the Input Section of the workspace by clicking and dragging url element with url and the method with the method.
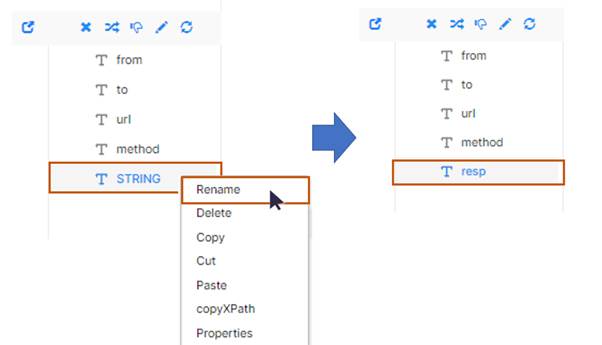
Now taking the response in the Response Section of the workspace. To get the response create a new element in the Response Section of the type STRING and rename it to resp.
Right-Click on the response section and an OUTPUT SCHEMA context menu will be displayed. Select String from the context menu.
Right-click on the STRING and Select Rename. Rename the STRING element to resp.
Map the resp element with the respPayload in the Response Section.
Click save to save the web service.

A message dialog box will appear confirming the save operation.
Now we need to create another service for converting the string to JSON as we did in the WeatherAPI tutorial.
Now right-click on the Syncloop Workspace and an API DESIGNER context menu will be displayed. Click on Service in the context menu.
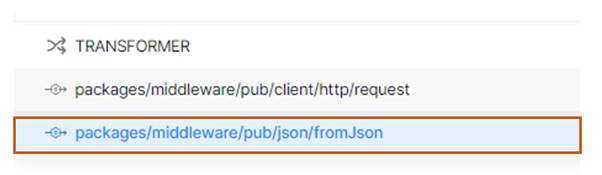
A dialog for selecting a service will be displayed. Search the service in the package explorer window by typing request in the search package textbox. In this case, we have to type fromJSON in the search package textbox.

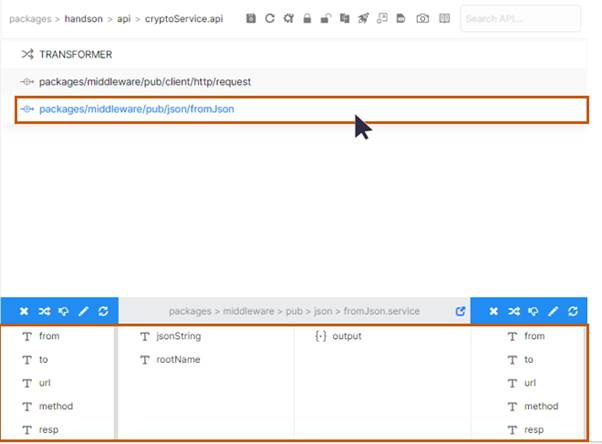
Select the fromJSON by searching in the package search textbox and then clicking on the fromJSON service once searched. Once the fromJSON service is selected click on the Done button to confirm. The fromJSON service will be added to the workspace.
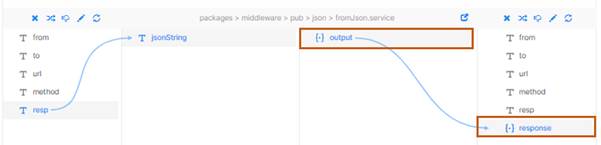
Now click on the fromJSON service path and observe the input and output parameters in Request and Response sections of the workspace.
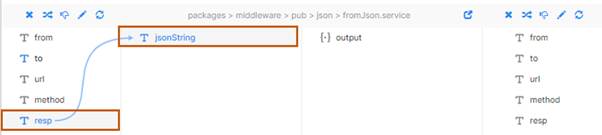
In the Request Section of the workspace map the resp element with jsonString
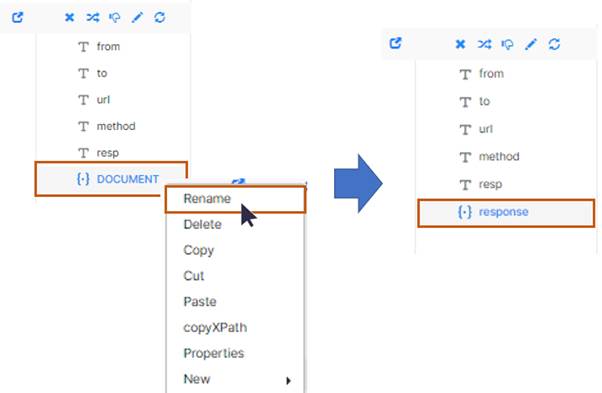
Now create the output parameter as response of type Document. To do that right-click on the Response Section in the workspace and an OUTPUT SCHEMA context menu will be displayed. Select the Document in the menu by clicking on it.
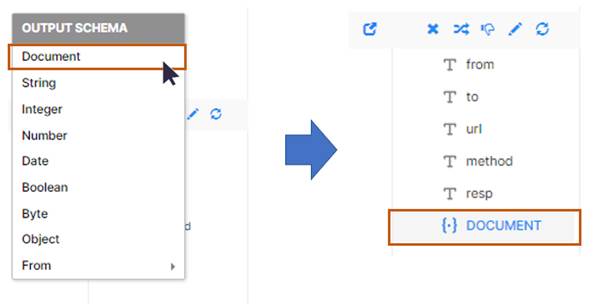
Right-Click on the Document element and a context menu will be displayed. Select Rename from the context menu by clicking on it. Rename the DOCUMENT element to the response.
Now map the output with the response element in the Response Section of the workspace by clicking and dragging.
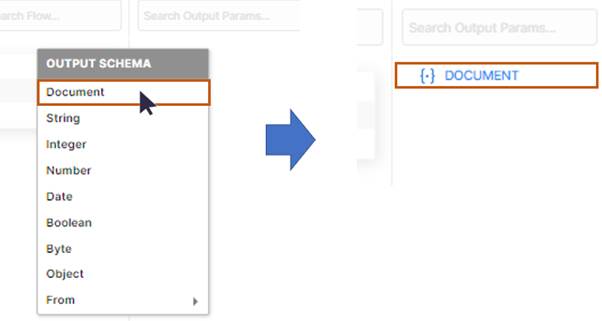
We need to create one output parameter with same name response. Right-Click on the output section and an OUTPUT SCHEMA context menu will be displayed. Select DOCUMENT by clicking on it.
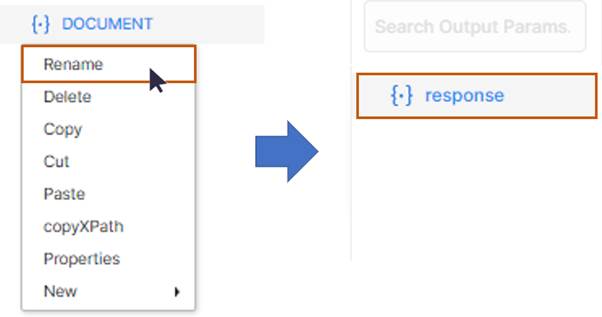
Right-Click on DOCUMENT and a context menu will be displayed. Select Rename to rename DOCUMENT to the response.
Save the Service by clicking on the Save tool in the Workspace tool bar.

A message dialog box will appear confirming the save operation.
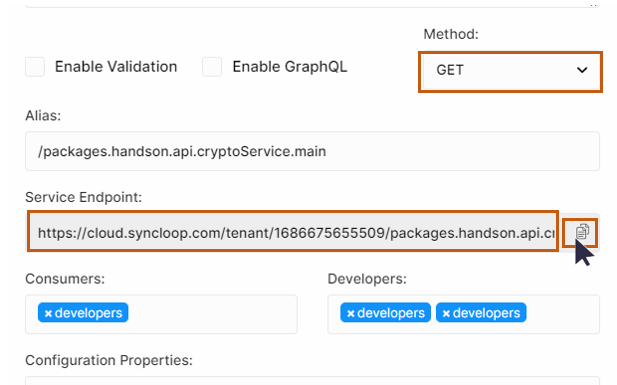
Click on the configuration tool and open the configuration dialog. Set method to GET and copy the service endpoint of the web service by clicking on the
![]() copy tool. While you copy the service endpoint a copied message will be displayed on the tool.
copy tool. While you copy the service endpoint a copied message will be displayed on the tool.
Now let us test the service now.
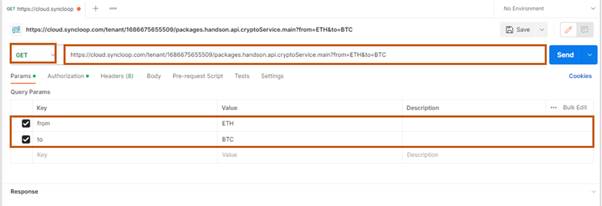
Open the Postman application and create new request and paste the endpoint in the request URL. Set the method to GET and pass the parameters from and to. Set from parameter value to ETH and to parameter value to BTC.
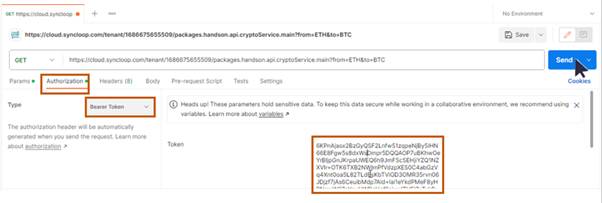
Set the Authorization to Bearer token and copy the API token value from the workspace.
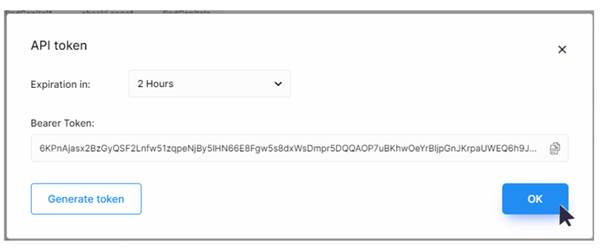
and paste it into the bearer token textbox in the Postman Application and Click on Send button to send this request.
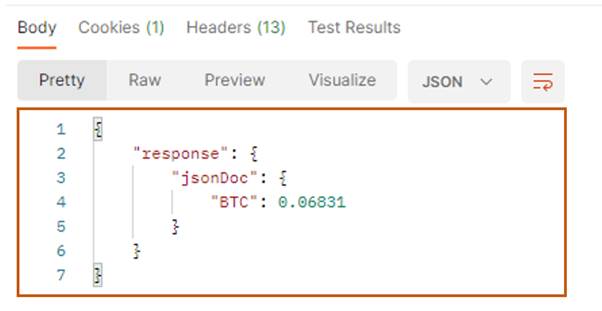
Observe the Response from the server.
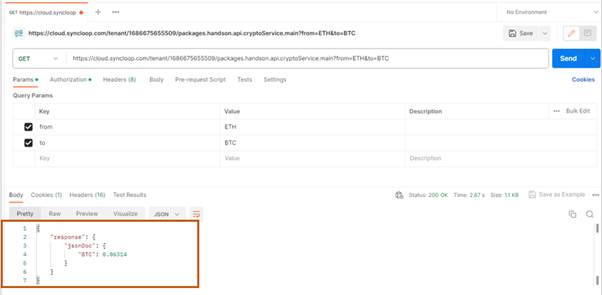
The detailed output is shown in the response section of the Postman Application. In this example, the service is providing the conversion of ETH to BTC