Docs Menu
- Introduction to Syncloop
- Quick Start Syncloop
-
API Developer Guide
-
middleware
-
pub
- adapter
- authorization
- client
- collection
- date
- docList
- file
- graphQL
- io
- json
- jwt
- math
- platform
- security
- server
- service
- specs
- sql
- string
- bytesToHexString
- bytesToString
- compare
- compareStrings
- concat
- decodeBase64
- decodeHTML
- encodeBase64
- encodeHTML
- equals
- equalsIgnoreCase
- escapeSQL
- fromXML
- htmlDecode
- htmlEncode
- indexOf
- isAlphanumeric
- isBlank
- isDate
- isEmpty
- isNumber
- length
- lookupDict
- maskString
- messageDigest
- messageFormat
- NullOrWhiteSpc
- objectToString
- padLeft
- replace
- rightPad
- stringConcat
- stringIndexOf
- stringToBytes
- subString
- TextArrayToTextString
- TextListCollector
- tokenize
- toLower
- toString
- toUpper
- trim
- urlDecode
- tenant
- util
- xml
-
pub
-
middleware
- User Guide
- FAQs
- Java Docs
- Blogs
Using the Syncloop Dashboard

Package Explorer
Package Explorer has a tree structure composed of default Packages that have been already created on the Syncloop Environment. Each package can store many web services which could be integrated and reused by other packages within and outside the environment. Even external APIs can be integrated with the current web services which again can be stored in these packages. The root package cannot be deleted.
The name of the packages has some restrictions which include that the name should not be a reserved word. The following words are reserved and cannot be used in naming the packages. These include
abstract, assert, boolean, break, byte, case, catch, char, class, continue, default, do, double, else, enum, extends, final, finally, float, for, if, implements, import, instanceof, int, interface, long, native, new, null, package, private, protected, public, return, short, static, strictfp, super, switch, synchronized, this, throw, throws, transient, try, void, volatile and while
Root packages contain global properties

To create a new package right click on the root package  packages and select New
🡪 Package
packages and select New
🡪 Package
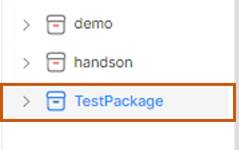
A Create New Package dialog will be displayed. Type the name of the package as TestPackage in the Package Name textbox and Click on the OK button.
The TestPackage package will be created in the Package Explorer section.
Now click on TestPackage package right angle bracket the branches of the TestPackage package will be displayed.
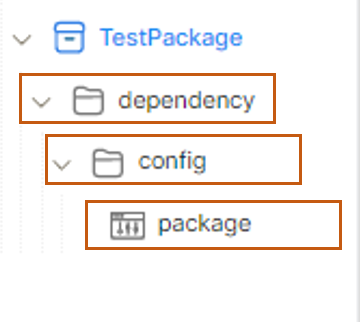
It will display dependency and config folders with one default package service. The description of these is shown below
1. dependency folder (contains all the API configurations libraries)
2. config folder (contains all API property files & package level properties)
3. package (jars) (contains all custom libraries written in Java)
Side Bar
The Side Bar is found on the left side of the Syncloop Workspace. These tools are used to schedule, keep track of the API, get detailed API developer documentation, track the tokens, schedule the APIs, migrate APIs, and much more. The list of tools in the Side Bar is shown in the image below:
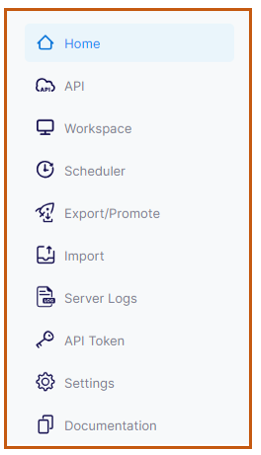
A detailed description of the tools is given below.
Home
The Syncloop home screen provides a primary navigation screen for the workspace. All the main features provided by the Syncloop workspace are listed on the home page. This page also provides access to various tutorial videos that aid in learning the Syncloop platform.
API
This tool provides the API Dashboard. It provides options for creating, exporting, and executing APIs that are stored in the system's global package. This also provides users with critical analytic insights into its API activities or debugging your APIs through the logged data.
Workspace
This tool displays the Syncloop workspace.
Scheduler
Schedular is used to execute services based on the Cron expression. If we have to execute an API once every day, we may use this Scheduler function that will enable us to fire the API at a particular instance of time. It is just like setting up of alarm for API consumption.
To access the schedule feature,
click on the Schedule tool in the toolbar. It has a clock-like  icon. Once the
tool is
clicked the schedular window is displayed.
icon. Once the
tool is
clicked the schedular window is displayed.
Export/promote build
Syncloop provides options for exporting or promoting APIs. The APIs that have been created in the workspace can be either promoted, exported, or downloaded on the local machine. There is a provision for selecting single and multiple services/ packages that are to be promoted or exported to another environment. The Syncloop provides a wizard interface for export and promote operations. The steps involved in exporting, promoting, and Building are shown below.
1. To export an API, select the Export/Promote Build icon  in the toolbar
2. Export Packages window will be displayed.
3. Select the packages that you want to export and click the Next Button
4. Select whether you want to download, Add/Link New Environment or promote the service to another platform.
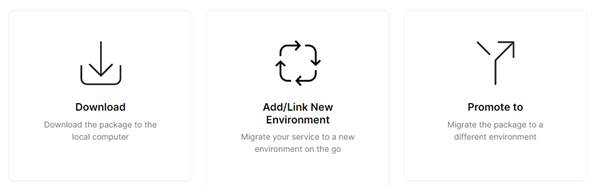
Selecting the download option will download the API on the local machine in the jar format.
6. Add/Link New Environment will provide a link to another tenant wherein the service created can be promoted/exported to that tenant.
7. Selecting Promote To option will ask the user to select the appropriate environment.
After selecting the appropriate environment, the API gets successfully exported to that environment.
Server Log
Syncloop server log files are a raw, unfiltered look at traffic to your site. All the events and activities that take place in the Syncloop workspace for every tenant are recorded in the Server log. To access the server log
1. Click on the  icon and the Server log
page will be displayed
icon and the Server log
page will be displayed
2. This page contains server logs in a line-by-line manner which could be refreshed manually after a particular interval of 5 or 10 seconds.

Import
This option is used to import or manually promote APIs that are exported from the export screen. Only Syncloop exported files can be imported into the workspace.
The various steps involved in importing the exiting API from the device are shown below:
1. Click on the Import tool icon  and an open dialog window
will be displayed
and an open dialog window
will be displayed
2. Choose the exported zip file from your local system and upload it.
3. The API will be successfully imported into the Syncloop workspace.
API Token
This token can be used when APIs are accessed through some external application resource like Postman etc.
The Syncloop generates tokens based on private-public keys added to the global property. The user has the privilege to change the key-pair
To access the API Token
1. Click on the web service in Package Explorer for which the token needs to be generated.
2. Click on the API Token icon  in the toolbox.
3. The API Token window with bearer token value will be displayed. Expiration time for the token can also be specified in Expiration in Drop Down. Built-in as well as custom time durations can be specified for the services before these bearer tokens expire.

4. Copy the Token value to the clipboard and paste it wherever API is to be implemented
Settings
This tool enables a user to change his personal settings pertaining to profile, team, group, environments, etc.
Documentation
Syncloop documentation provides a technical content deliverable, containing instructions about how to effectively build, schedule and integrate APIs on the platform. Syncloop has provided a concise reference manual containing all the information required to work with the APIs, details about the functions, classes, return types, arguments, and more, supported by tutorials and examples. Syncloop API Documentation has traditionally been done using regular content creation and maintenance tools and text editors.
To access the documentation, click on the documentation icon  and you will be directed to a detailed documentation page. There is a huge library of Syncloop internal APIs that can be accessed directly from the Workspace by calling them through the flow service.
The Syncloop documentation consists of an introduction, training videos, and API Developer Guide.
and you will be directed to a detailed documentation page. There is a huge library of Syncloop internal APIs that can be accessed directly from the Workspace by calling them through the flow service.
The Syncloop documentation consists of an introduction, training videos, and API Developer Guide.
In the introduction, various features of the Syncloop platform are briefly explained. It also provides insight into various editions of the Syncloop platform with a quick start guide.
The training videos are grouped into three categories basic intermediate and advanced. These videos provide information regarding various popular working aspects of the platform while giving developers a hands-on experience on the platform.
The API developer guide provides built-in APIs that can be called and reused by integrating with other APIs on the platform. These built-in APIs include http, database, doclist file, etc.
Menu Bar

This menu bar is present at the top of the Syncloop Workspace. On one side it has the Syncloop logo and name and on the other side, it has three menu items.
1.Watch Tutorials
2.Clear Cache
3.Logout
Watch Tutorials
This takes us to the watch tutorial videos page. This page has short videos highlighting various operations of the Syncloop platform. Click on the watch tutorial menu item to watch these short videos.
Clear Cache
This cache temporarily stores the recently created or used services. Once the Clear Cache menu item is clicked all the cache of the workspace is cleared.
Logout
Click on logout to logout from the workspace.